
In the life of any adult and accomplished men there comes a time when it becomes vital helicopter. Well, or more stylish and trendy solution in the face of the drone. Not spared this fate and I, but I, as usual, could not remain silent and not to share my impressions about my first experience of flying.
The first thing I decided for myself to spend on this entertainment more than $ 50 I don’t want, we need to limit their expenses, especially as the main hobby requires too much Finance. Yes, and almost certainly the first Quad will be very rock-n-roll, with the maximum probability will be the fate “live fast, die young”. But besides that, I’d still like some no, but live video “on Board”. Prosherstiv different shops, I found a model that seemed superficially attractive — VISUO XS809W with coupon “XS809WS8” it only costs $ 40, perfectly exposed lying in my limit. Quadrics this fairly new, emerging in the market, I think we all guessed that it is this model, I stopped. However, if you look for something else, coupon “SAVE10” will give you a 10% discount on any product in this store.
I will not describe the delivery process (quickly and conveniently) and will not torture the readers with a description and photo of the package (the usual flat cardboard box with handle, inside plastic insert with recesses in which are placed all). Box a little dented in the mail, but her insides didn’t suffer at all. In addition, perhaps, I should say that the quadcopters I’m a complete ignoramus, so a review from me will be as Amateur, however, almost all of the time we act as beginners and therefore Amateur review enables you to evaluate your own feelings in the early development.
To start the package. In the box are: quadrics, remote, 4 spare propeller, protection for the screws (if you, like me, a newbie — just put it), battery, cable for charging and the instruction. “Manual” is printed in perfect English, but deal with him fairly easily.
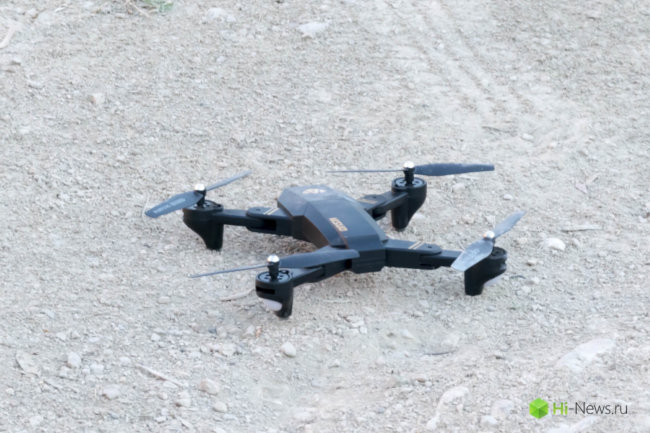
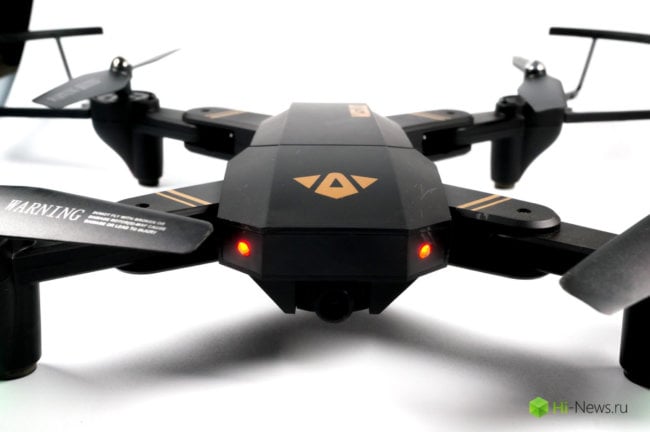
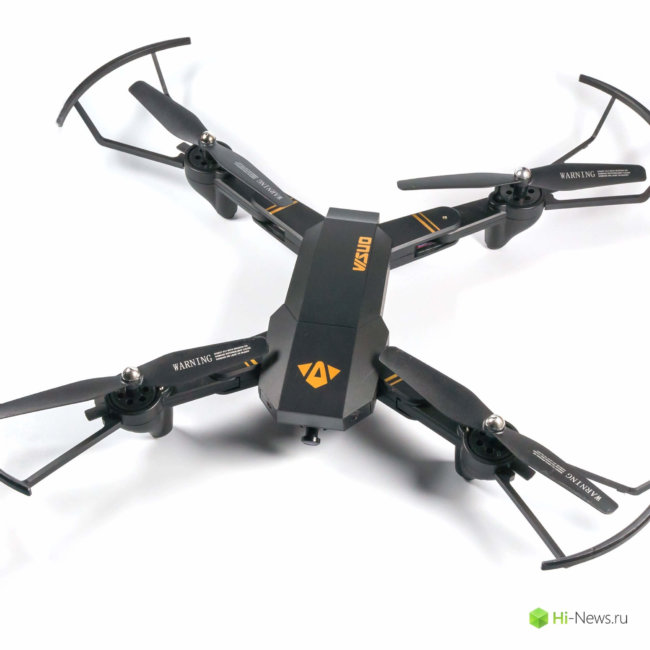
The quadcopter DJI shamelessly copied from Mavic that went in his favor, predatory profile, folding design — all neatly borrowed from “big brother”. Of course, there are collector motors, drive gears, but I suspect that this copter, I still will not live to see the establishment of a resource of brushes. The toy is made from a lightweight but durable enough (as it turned out in the process), plastic, quality for $ 40 very good, although a little work with a screwdriver and tighten a few screws still had.
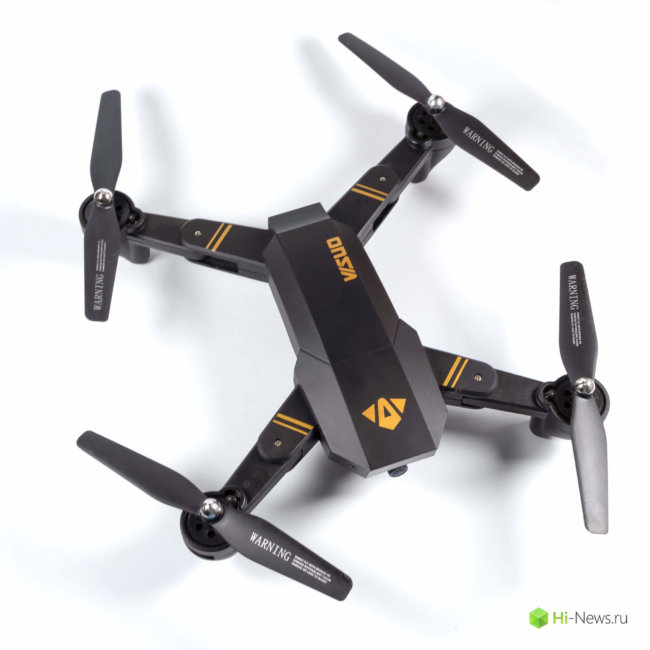
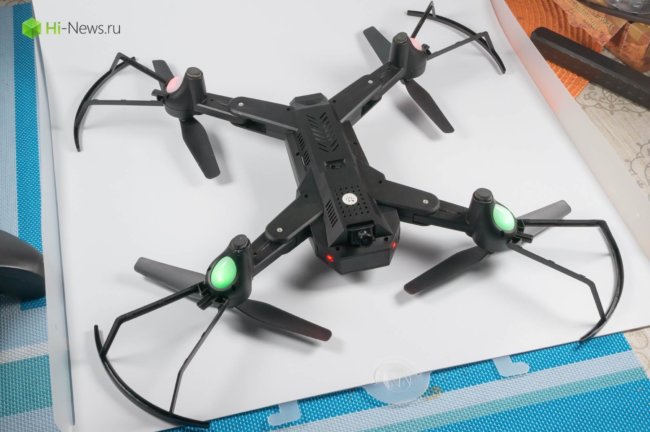
XS809W — compact enough, unfolded distance between the motors of the propellers is 32 cm, folded — quadrics fits into a rectangle 13 by 18 cm, of Course, it figures installed without protection (and I advise you to put it). Traditionally at the bottom of the engine nacelles (I hope that term applies here) are LEDs, front — two green, rear — two red, they are bright enough and its job is to show where turned your vehicle — do it. In this model “illumination” is complemented by two led “eyes” on the side “face”, they glow red and fit well into the image.
Legs for takeoff and landing and XS809W is not provided, it sits directly on the rubber insert at the bottom of the motor compartment so what about the idea to launch from the grassy meadows have to forget. Although, if you need to mow the lawn — the quadcopter can do it, albeit not very effectively. By the way, to protect the screws just pull out on each compartment of engine plugs and insert a protective arc until it clicks.
The battery is then as simple as possible, it is inserted into the quadrics in the back and fixed with a latch. During the first flights it is very well holds the battery in place, but I would still fix it with duct tape or blue tape — drops, which will be a lot, the probability of random smoothline and no less random “Sampoerna” is far from zero. The battery is charging from a regular MicroUSB, although I advise you to use complete transaction — it is equipped with an indicator showing that the battery is fully charged. The figures operating time and charging is very close to the stated 25% speed, was originally included, the copter is really flying about 8 minutes, charging will require about two hours. So the most impatient immediately advise to buy a spare battery or two, the benefit they are inexpensive.
The card, incidentally, also is to fix it with tape, as during the last series of missions, after a particularly good drop, my card is 32 GB was knocked out and left somewhere in the grass, depriving me of the opportunity to show you removing the photos and videos (however, see there is not much that is 0.3 mega pixels — this is not a solution for shooting).
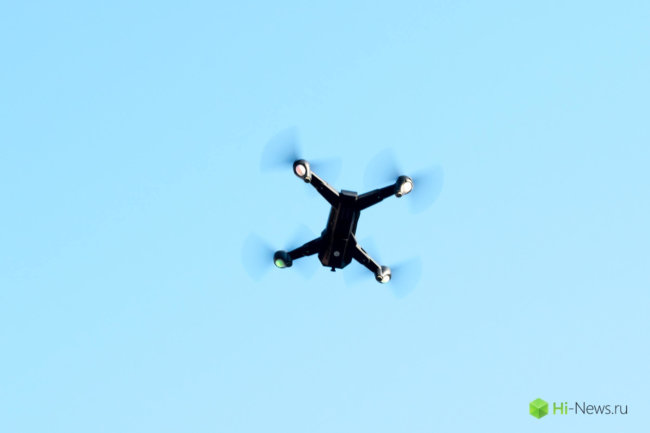
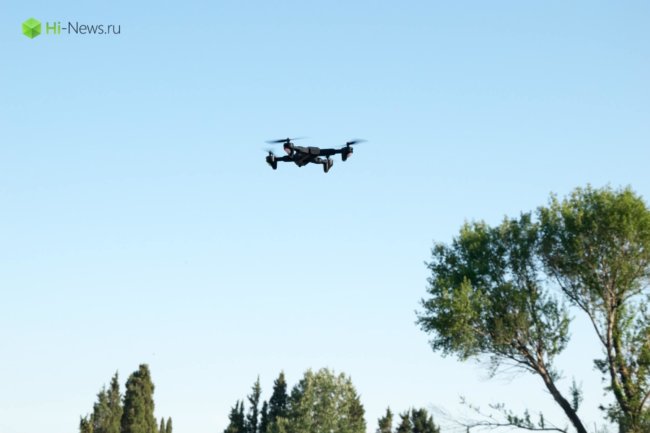
Copter equipped with a camera, in the budget version, it has a crazy resolution of 0.3 mega pixels, it’s not a serious photo – and video shooting can not speak. But for video broadcasts to your smartphone via Wi-Fi it is more or less suitable, the delay is there, but within a tolerant, stable signal in the distance somewhere up to 35-40 meters, although the “range” panel higher — you can fly somewhere meters in 70, and after about 100 meters the drone loses control. As there is no GPS to rely on the safe return is not necessary, so be careful and calculate distances. For first flights it is best to choose a large empty space, so as to bring down the copter out of a tree — the pleasure is very below average (especially if they have a barn to climb). I already said that it is necessary to put the protection? Well.
If you still want to enjoy the photo capabilities of this camera — you will need to install a MicroSD card, where the snapshots will be saved. From the manufacturer have an older model, it costs $ 49 without the discount (you can try the coupon XS809W), there is a camera at 2 mega pixels and a barometric sensor for the altitude holding. If the camera is still doubtful, the quality remains so-so, but for the sensor I would gladly pay extra, but more on that below.
While that will talk about the remote. It is comfortable enough (though to compare I’d still have nothing), fits well in hand, all the sticks and buttons are within reach. Center made hinged spring-loaded mount for smartphone iPhone 6 Plus was like a native, and the balance of weight with the phone is good, the remote is not back outweigh.
Seasoned quadrilette (although why would they read my review?) you can skip the description of the panel, making a submission on the photos for the rest will tell you briefly about the management.
Left stick is spring loaded only on the horizontal axis, its vertical stroke is absolutely free, because it adjusts the height. Movement same horizontal XS809W turn around the vertical axis. The right stick is spring loaded in both directions and serve to move forward-backward and left-right in a horizontal plane.
Under the left stick is a standard four-way button trimming, it is one of the main friends of a novice pilot. With considerable probability, immediately after takeoff (and a couple of punches on the ground), your drone will begin to spontaneously move anywhere in the horizontal plane. To rectify this opportunity — click on the x in the opposite direction to the displacement, as long as the mess will not stop. If you really overdo it with this adjustment, it can always be reset by sending both the stick at an angle of 45° from the center and down. This will reset the settings of the trimming, but to do that, of course, on the ground.
In the left side panel also has two buttons located. The first is responsible for the automatic takeoff and landing, lifting the copter 1.5 meters up or planting it, but since I have the cheapest version without height sensor — this button I does nothing. Under that is the emergency stop button, when pressed, the drone will shut down the motors and gently fall down. Of course, the drop will not benefit him, but it’s better than being stuck at the top of the pine trees or fly into neighbor’s Maybach. By the way, share his observation — the impact of the propeller on the fingers — noticeable, but does not cut through the skin, but arrival face to avoid.
The right side panel is a power button, photo button and video button return “home” (works very so-so, I’d not really counted on it) and press the “headless mode” (for the headless flyers). In this mode, you simply choose the direction of movement of the right stick, and the copter is moving there, no matter where he turned “face”. In theory, this simplifies management, since you don’t need to wonder where to turn your quadcopter but in practice it is better to avoid and learn “full” control. Runs “headless” mode is often not really while training normal control slows down.
On the front of the console are two buttons, designed for the pushing by index fingers. Left speed switches, at first, included 25% of the total, clicking the includes 50%, and it is 100%. Friendly advice: first, forget about this button. It is not, does not exist until you swoop in at least an hour and a half. The right button makes the flip (beautiful revolution in the air). It works simply: earn at least 3 meters height, press it, hear the squeak of the console and move the left stick left or right, enjoying the spectacular Somerset and applause of the audience. However, be prepared for the fact that after the flip you may need to adjust the height after hitting the ground the spectators ‘ applause can spoil.
The remote is powered by 3 AA batteries (not included), the cover of their compartment fastened cross screw, so installation and replacement will need a screwdriver (included).
The last thing is to tell you to go to the flights on the app for smartphones. As XS809W proudly marketed as a “selfie drone” and “FPV-copter”, he must be able to convey a video stream to a smartphone, which he does. The guide includes QR codes to download apps, iOS link leads to some strange Chinese website where you can download APK-shku (thank you, damn, big). Fortunately, the store says that to control you use XSW UFO, so you can find and install it through the App Store is not the problem. Works very simple: connect to a Wi-Fi network camera, launch the app and immediately see an image from the camera. If you want you can run quadrics and to fly using virtual sticks, but, honey, this is not recommended, to drive so not very convenient. So I broke my first prop trying to take off in the room and hitting the quadrics on the table (Oh, if someone advised me to put at first…). Yes, if you do not understand yet — for domestic flights this model is not very suitable (an exception can be made if you have a house of such size that their dogs do you take on a private plane).

Anyway, enough about the abstract, let’s dig in — flight. Charged the battery, put it in place, turn on the Quad, admiring the beautiful lighting, put the copter on the floor, remove all the living and non-living valuable to a safe distance. Turn on the console, we hear a squeak, then move the stick height at maximum up (squeak), then — at least down (squeak), everything from this point on quadrics ready for take-off, and any displacement of the stick height, start the screws.
And again, advice from personal experience — move left stick is very smooth, in General, first try not to touch it right, learn how to keep the height, it’s not as easy as it looks from the side (Yes, I know that most readers were born with a talent for piloting in the blood, but I’m clearly not one of those, so this advice LAMER of LAMER). Along with learning to hold the height — see if the displacement of the camera along the horizontal axes, and adjust it using the trimmer (this is inconvenient, because all this will have to do with one hand).
Getting used to the altitude, gradually train movement in the horizontal plane with the right stick, then you can train turns.
A few more tips for beginners. Take your time to try flips or increase the speed, just not in a hurry. Don’t be afraid of falls, especially from a small height, it’s better than hanging on a tree or a sharp side kick. Don’t be afraid of accidents, they are inevitable at first, but this baby is sturdy enough and lightweight to move rough-housing. Of course, you can “not get lucky”, but that no one is immune, and in this case, you can console yourself with the fact that this copter from cheap. Do not attempt at first to fly video on the screen firstly, it is broadcast with a delay, without a second skill, it still will not work. Try not to fly away — loss of control with this drone is real, and the search for his crash site can become a problem. By all means avoid falling into bushes, trees, power lines and other interference — after the accident, the quadrics just turns off the engines and the bright blinking lights, waiting until you somehow clear. In particularly bad cases, this can be a major problem. Also use common sense and do not fly where you can someone to stop.
By the way, the results of the 7 “otlichnyh” batteries: 1 protection is left somewhere in the bushes, one of the beams is now on the tape (after blow I took off the locking bolts), lost memory card. Considering how many times I dropped it, the result may be considered very good.
In General, flying was a little more complicated than I had first thought, but XS809W has been very adequate to manage and robust enough to survive typical beginner errors are good from the start “flying career” was wildly positive, and this is the main motivator not to give up and to learn further.
By the way, I’ve collected some video from my first attempt to fly (cut out of an accident), it looked something like this.

Browse quadcopter XS809W VISUO — impressions of a newbie
Pavel Dmitriev